使用 Flink 同步 OceanBase 不同租户间数据 #
本文参照 #
使用 Flink 同步 OceanBase 不同租户之间数据
概念介绍 #
oblogproxy
oblogproxy 是 OceanBase 数据库的增量日志代理服务,基于 liboblog,以服务的形式提供实时增量链路接入和管理能力,方便应用接入 OceanBase 增量日志。oblogproxy 能够解决在网络隔离的情况下,订阅增量日志的需求,并提供多种链路接入方式。开源项目地址: https://github.com/oceanbase/oblogproxy。
Flink CDC
Flink CDC 是一个使用 Apache License 2.0 协议的开源项目,支持从 MySQL、MariaDB、Oracle、MongoDB、SqlServer、TiDB、OceanBase 等数据库中实时地读取存量历史数据和增量变更数据。开源项目: https://github.com/ververica/flink-cdc-connectors。
使用场景 #
由于当前 OceanBase 社区版不支持跨租户访问,那么在一些用户的大数据场景下使用起来不方便,所以基于 Flink CDC 来同步不同租户的数据回写到第三个租户,最后应用访问第三个租户的数据即可,同时在同步过程中又可以进行数据的预处理,对应用层来说,数据访问更加简单。但需注意该操作也存在数据冗余的缺点。
本场景为 OceanBase 数据库不同租户之间的数据同步。oblogproxy 调用 liboblog,获取上游 OceanBase 数据库租户中的增量事务数据,Flink 捕获上游数据的变化,实时读取上游节点的全量数据和增量数据,进行计算和处理后发送数据给下游 OceanBase 租户。该方法同样也适用于 MySQL 与 OceanBase 以及 OceanBase 与 OceanBase 之间的数据同步。
前提条件 #
java 1.8.0+。
部署 OceanBase 4.0 版本集群,并创建 3 个租户(本文示中为 flink_cdc_1、flink_cdc_2、flink_cdc_3)。
部署 oblogproxy。
部署 Flink-1.16.1 版本。
Flink CDC
flink-sql-connector-oceanbase-cdc-2.3.0.jar(OceanBase 数据库写入 Flink)
flink-connector-jdbc-1.16.1.jar(Flink 写入 OceanBase 数据库)
软件部署 #
部署 oblogproxy #
下载 oblogproxy 并解压。
下载地址为: https://github.com/oceanbase/oblogproxy/releases4
wget https://github.com/oceanbase/oblogproxy/releases/download/v1.1.0/oblogproxy-ce-for-4x-1.1.0-20221201191325.tar.gz
mkdir /home.admin/oblogproxy && tar -zxvf oblogproxy-ce-for-4x-1.1.0-20221201191325.tar.gz -C /home.admin/oblogproxy
配置环境变量。
[admin@obtest004 ~]$ sudo vim /etc/profile
## 请根据实际安装路径配置
export LD_LIBRARY_PATH=$LD_LIBRARY_PATH:/home/admin/oblogproxy/liboblog
[admin@obtest004 ~]$ source /etc/profile
确认 oblogproxy 依赖。
[admin@obtest004 ~]$ cd oblogproxy
[admin@obtest004 oblogproxy]$ ldd ./bin/logproxy
        linux-vdso.so.1 =>  (0x00007ffe701e8000)
        libobcdc.so.4 => /home/admin/oblogproxy/liboblog/libobcdcso.4 (0x00002b3dbdb58000)
        libaio.so.1 => /home/admin/oblogproxy/liboblog/libaio.so.1(0x00002b3dedc65000)
        libmariadb.so.3 => /home/admin/oblogproxy/libobloglibmariadb.so.3 (0x00002b3dede67000)
        libpthread.so.0 => /lib64/libpthread.so.0(0x00002b3dee0cd000)
        libdl.so.2 => /lib64/libdl.so.2 (0x00002b3dee2e9000)
        librt.so.1 => /lib64/librt.so.1 (0x00002b3dee4ed000)
        libm.so.6 => /lib64/libm.so.6 (0x00002b3dee6f5000)
        libc.so.6 => /lib64/libc.so.6 (0x00002b3dee9f7000)
        /lib64/ld-linux-x86-64.so.2 (0x00002b3dbd934000)
修改配置文件。
基于安全考虑,OceanBase 的 sys 租户账号和密码,需要通过加密配置给 oblogproxy。执行以下命令即可得到账号和密码的密文,您需将账号和密码的密文分别配置到 conf.json 中的
ob_sys_username和ob_sys_password字段中。注意
此处的用户必须为 sys 租户下的用户,若使用非 root 用户,需要提前在 sys 租户中创建对应用户。
## 生成加密用户和对应的密码
[admin@obtest004 oblogproxy]$ cd bin
[admin@obtest004 bin]$ ./logproxy -x root@sys
EA87*****************E1556E917

## 请输入实际密码
[admin@obtest004 bin]$ ./logproxy -x ********
8852D*****************A9D8FD52

## 修改conf.json 参数
[admin@obtest00 oblogproxy]$ cd conf/
[admin@obtest00 conf]$ vim conf.json
{
 "ob_sys_username": "EA87*****************E1556E917",
 "ob_sys_password": "8852D*****************A9D8FD52",
}
启动 oblogproxy。
[admin@obtest004 oblogproxy]$ ./run.sh start
work path : /usr/local/oblogproxy
is_running : (8252)/usr/local/oblogproxy logproxy is running !
logproxy started!
查看进程,确认启动成功。
[admin@obtest004 ~]$ ps -ef | grep logproxy | grep -v grep
admin    28808 28800  1 10:47 pts/2    00:00:33 ./bin/logproxy -f ./conf/conf.json
当有一个 Client 连接成功后会 fork 一个子进程。
[admin@obtest004 ~]$ ps -ef | grep oblogreader | grep -v grep
admin     4227 28808  6 11:10 pts/2    00:01:22 oblogreader    -f ./conf/conf.json
部署 Flink #
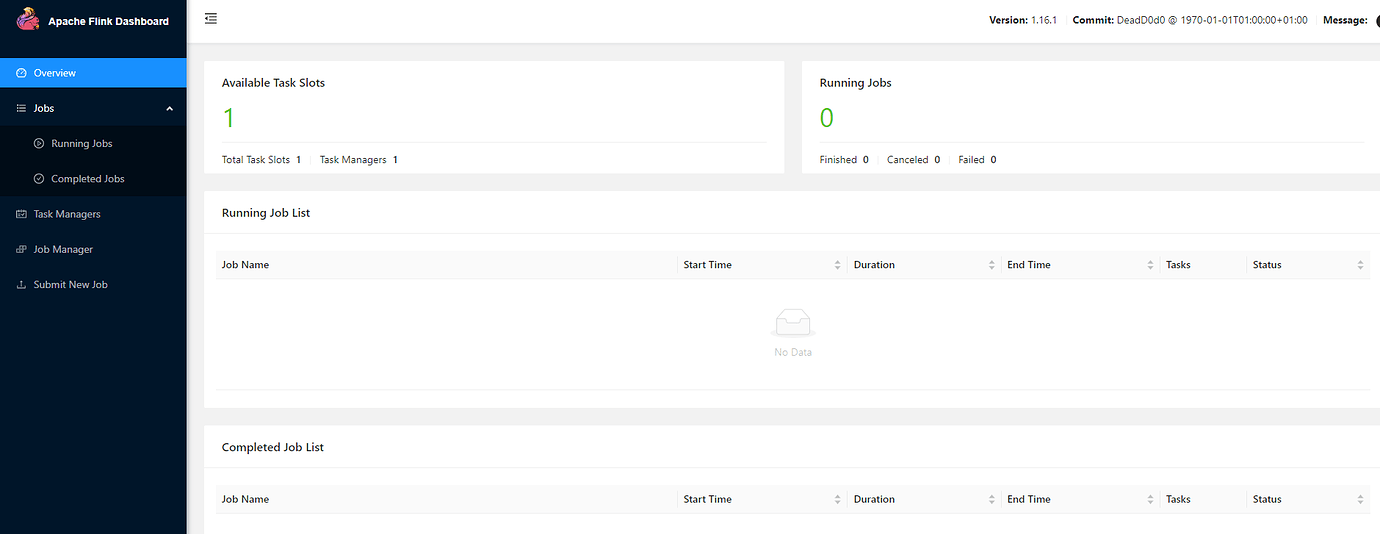
Flink 部署有集群模式和单节点模式,本次测试主要使用单节点部署。单节点部署比较简单,直接解压安装包就可以使用,不用进行其他的配置。启动成功后,访问 http://localhost:8081/#/overview,便可以对 Flink 任务进行监控管理。
下载 Flink 并解压。
[admin@obtest004 ~]$ wget https://archive.apache.org/dist/flink/flink-1.16.1/flink-1.16.1-bin-scala_2.12.tgz
[admin@obtest004 ~]$ tar -zxvf flink-1.16.1-bin-scala_2.12.tgz
编辑 flink-conf.yaml 配置文件,并根据实际安装路径配置 Java 环境变量。
[admin@obtest004 ~]$ cd flink-1.16.1/
[admin@obtest004 flink-1.16.1]$ vim conf/flink-conf.yaml
## 添加配置
env.java.home=env.java.home=/usr/lib/jvm/jre-1.8.0-openjdk-1.8.0.362.b08-1.el7_9.x86_64
3、下载 oceanbase-cdc 和 jdbc-connector 组件。
## 下载 jar 包
[admin@obtest004 flink-1.16.1]$ cd lib/
[admin@obtest004 lib]$ wget https://repo1.maven.org/maven2/com/ververica/flink-sql-connector-oceanbase-cdc/2.3.0/   flink-sql-connector-oceanbase-cdc-2.3.0.jar
[admin@obtest004 lib]$ wget https://repo1.maven.org/maven2/org/apache/flink/flink-connector-jdbc/1.16.1/   flink-connector-jdbc-1.16.1.jar
[admin@obtest004 lib]$ ll
total 220140
-rw-r--r-- 1 admin admin    198857 Jan 19 22:20 flink-cep-1.16.1.jar
-rw-r--r-- 1 admin admin    516144 Jan 19 22:21 flink-connector-files-1.16.1.jar
-rw-rw-r-- 1 admin admin    248892 Jan 19 23:16 flink-connector-jdbc-1.16.1.jar
-rw-r--r-- 1 admin admin    102470 Jan 19 22:23 flink-csv-1.16.1.jar
-rw-r--r-- 1 admin admin 117107159 Jan 19 22:29 flink-dist-1.16.1.jar
-rw-r--r-- 1 admin admin    180248 Jan 19 22:23 flink-json-1.16.1.jar
-rw-r--r-- 1 admin admin  21052640 Jan 19 22:28 flink-scala_2.12-1.16.1.jar
-rw-rw-r-- 1 admin admin  10737871 Jan 13 23:11 flink-shaded-zookeeper-3.5.9.jar
-rw-rw-r-- 1 admin admin  18167926 Nov  9 23:18 flink-sql-connector-oceanbase-cdc-2.3.0.jar
-rw-r--r-- 1 admin admin  15367504 Jan 19 22:28 flink-table-api-java-uber-1.16.1.jar
-rw-r--r-- 1 admin admin  36249667 Jan 19 22:24 flink-table-planner-loader-1.16.1.jar
-rw-r--r-- 1 admin admin   3133690 Jan 19 22:20 flink-table-runtime-1.16.1.jar
-rw-rw-r-- 1 admin admin    208006 Jan 13 21:32 log4j-1.2-api-2.17.1.jar
-rw-rw-r-- 1 admin admin    301872 Jan 13 21:32 log4j-api-2.17.1.jar
-rw-rw-r-- 1 admin admin   1790452 Jan 13 21:32 log4j-core-2.17.1.jar
-rw-rw-r-- 1 admin admin     24279 Jan 13 21:32 log4j-slf4j-impl-2.17.1.jar
4、启动 Flink,如下所示表示启动成功。
[admin@obtest004 lib]$cd ~/flink-1.16.1/bin
[admin@obtest004 bin]$ ./start-cluster.sh
## 输出如下
Starting cluster.
[INFO] 1 instance(s) of standalonesession are already running on obtest004.
Starting standalonesession daemon on host obtest004.
[INFO] 1 instance(s) of taskexecutor are already running on obtest004.
Starting taskexecutor daemon on host obtest004.
从启动结果可以看到主要启动了两个进程 standalonesession 和 askexecutor,其中 standalonesession 进程对应的是 JobManager 类型,taskexecutor 进程对应的是 TaskManager 类型。
在
http://localhost:8081/#/overview 中查看 Flink 的 Web 页面。
数据同步测试 #
OceanBase > Flink #
测试目的 #
测试将 OceanBase 集群 cdc@flink_cdc_1 租户表 test1 的现有数据和增量数据能否正常同步至 Flink 中。
测试步骤 #
在租户 flink_cdc_1 中创建数据库并创建表 test1
在 Flink Client 中创建表 products
查看 OceanBase 侧表 test1 的数据能否正常同步至 Flink 侧表 products 中
在表 test1 中插入一条新数据,在表 products 中查看新插入数据的同步结果。
| Tenant | DataBase | Table |
|---|---|---|
| flink_cdc_1 | cdc_test1 | test1 |
操作步骤 #
在上游 OceanBase 集群 cdc@flink_cdc_1 租户中创建表 test1。
CREATE TABLE `test1` (
    `id` int NOT NULL,
    `name` varchar(45) DEFAULT NULL,
    `description` varchar(45) DEFAULT NULL,
    `weight` decimal(10,3) DEFAULT NULL,
    PRIMARY KEY (`id`)
  ) CHARSET=utf8mb4;
在表中插入数据并查询
MySQL [cdc_test1]> insert into test1(id,name,description,weight) values(1,'aa','haha',10);
Query OK, 1 row affected (0.006 sec)

MySQL [cdc_test1]> insert into test1(id,name,description,weight) values(2,'bb','haha',20);
Query OK, 1 row affected (0.002 sec)

MySQL [cdc_test1]> select * from test1;
+----+------+-------------+--------+
| id | name | description | weight |
+----+------+-------------+--------+
|  1 | aa   | haha        | 10.000 |
|  2 | bb   | haha        | 20.000 |
+----+------+-------------+--------+
2 rows in set (0.000 sec)
启动 Flink Client 。
[admin@obtest004 bin]pwd
/home/admin/flink-1.16.1/bin
[admin@obtest004 bin]$./sql-client.sh
在 Flink Client 中创建表 products。
CREATE TABLE `products` (
 id INT NOT NULL PRIMARY KEY,
 name varchar(32),
 description varchar(45),
 weight DECIMAL(10,3)
 ) WITH (
 'connector' ='oceanbase-cdc',
 'scan.startup.mode' = 'initial',
 'username' = 'cdc@flink_cdc_1',
 'password' = 'testcdc123',
 'tenant-name' = 'flink_cdc_1',
 'database-name' = 'cdc_test1',
 'table-name' = 'test1',
 'hostname' = 'xxx.xxx.xxx.xxx',
 'port' = '2883',
 'rootserver-list' = 'xxx.xxx.xxx.xxx:2882:2881;xxx.xxx.xxx.xxx:2882:2881;xxx.xxx.xxx.xxx:2882:2881',
 'logproxy.host' = 'xxx.xxx.xxx.xxx',
 'logproxy.port' = '2983'
 );
查询结果如下:
Flink SQL> select * from products;
[INFO] Result retrieval cancelled.
在上游 cdc@flink_cdc_1 租户表 test1 中插入一条数据。
MySQL [cdc_test1]> insert into test1(id,name,description,weight) values(3,'cc','haha',30);
Query OK, 1 row affected (0.003 sec)

MySQL [cdc_test1]> select * from test1;
+----+------+-------------+--------+
| id | name | description | weight |
+----+------+-------------+--------+
|  1 | aa   | haha        | 10.000 |
|  2 | bb   | haha        | 20.000 |
|  3 | cc   | haha        | 30.000 |
+----+------+-------------+--------+
3 rows in set (0.000 sec)
在 Flink Client 中查看数据的变化,可以看到刚插入进来的一条数据,说明数据可以正常从 OceanBase 集群 cdc@flink_cdc_1 租户中同步至 Flink 侧的表 products 中。
Flink > OceanBase #
测试目的 #
测试将 Flink 侧的数据能否正常同步至 OceanBase 集群 cdc@flink_cdc_2 租户的表 test2 中。
测试步骤 #
在租户 flink_cdc_2 中创建数据库并创建表 test2
在 Flink Client 中创建表 products
向表 products 中插入数据,查看在 Flink 侧插入的数据能否正常同步至 OceanBase 侧的表 test2 中 。
| Tenant | DataBase | Table |
|---|---|---|
| flink_cdc_2 | cdc_test2 | test2 |
操作步骤 #
在下游 OceanBase 集群 cdc@flink_cdc_2 租户中创建表 test2。
CREATE TABLE `test2` (
    `id` int NOT NULL,
    `name` varchar(45) DEFAULT NULL,
    `description` varchar(45) DEFAULT NULL,
    `weight` decimal(10,3) DEFAULT NULL,
    PRIMARY KEY (`id`)
  ) CHARSET=utf8mb4;
启动 Flink Client 测试。
[admin@obtest004 bin]./sql-client.sh在 Flink Client 中创建表 products。
Flink SQL> CREATE TABLE `products` (
   id INT NOT NULL PRIMARY KEY,
   name varchar(32),
   description varchar(45),
   weight DECIMAL(10,3)
   ) WITH (
     'connector' ='jdbc',
     'url' = 'jdbc:mysql://xxx.xxx.xxx.xxx:2883/cdc_test2',
     'username' = 'cdc@flink_cdc_2',
     'password' = 'testcdc123',
     'table-name' = 'test2'
    );
在 Flink Client 中插入两条数据。
Flink SQL> insert into products(id,name,description,weight) values(4,'dd','haha',40);
[INFO] Submitting SQL update statement to the cluster...
[INFO] SQL update statement has been successfully submitted to the cluster:
Job ID: f6ec0946d654e231fc0b900e62c449f3

Flink SQL> insert into products(id,name,description,weight) values(5,'ee','haha',50);
[INFO] Submitting SQL update statement to the cluster...
[INFO] SQL update statement has been successfully submitted to the cluster:
Job ID: 2967d5f99c20332793d6b4e8af5ada43
可以在下游 cdc@flink_cdc_2 租户表 test2 中查看到新插入的两条数据,说明数据可以正常从 Flink 侧同步至 OceanBase 集群的 cdc@flink_cdc_2 租户中。
MySQL [cdc_test2]> select * from test2;
+----+------+-------------+--------+
| id | name | description | weight |
+----+------+-------------+--------+
|  4 | dd   | haha        | 40.000 |
|  5 | ee   | haha        | 50.000 |
+----+------+-------------+--------+
2 rows in set (0.004 sec)
OceanBase(一个租户)> Flink > OceanBase #
测试目的 #
测试将 OceanBase 集群 cdc@flink_cdc_1 租户表 test1 中现有的数据和增量数据通过 Flink 同步至 OceanBase 集群 cdc@flink_cdc_2 租户表 test2 中。
测试步骤 #
在 Flink Client 中创建表 flinktest1 和 flinktest2
通过 insert into select 将 cdc@flink_cdc_1 租户的现有数据同步到 cdc@flink_cdc_2 租户中
在上游 OceanBase 侧表 test1 中进行 insert、delete、update,查看下游 OceanBase 表 test2 中数据的变化。
| Tenant | DataBase | Table |
|---|---|---|
| flink_cdc_1 | cdc_test1 | test1 |
| flink_cdc_2 | cdc_test2 | test2 |
操作步骤 #
在 Flink Client 中创建接收上游 cdc@flink_cdc_1 租户表 test1 数据的表 flinktest1,以及向下游cdc@flink_cdc_2 租户表 test2 同步数据的表 flinktest2。
Flink SQL> CREATE TABLE `flinktest1` (
 id INT NOT NULL PRIMARY KEY,
 name varchar(32),
 description varchar(45),
 weight DECIMAL(10,3)
 ) WITH (
 'connector' ='oceanbase-cdc',
 'scan.startup.mode' = 'initial',
 'username' = 'cdc@flink_cdc_1',
 'password' = 'testcdc123',
 'tenant-name' = 'flink_cdc_1',
 'database-name' = 'cdc_test1',
 'table-name' = 'test1',
 'hostname' = 'xxx.xxx.xxx.xxx',
 'port' = '2883',
 'rootserver-list' ='xxx.xxx.xxx.xxx:2882:2881;xxx.xxx.xxx.xxx:2882:2881;xxx.xxx.xxx.xxx:2882:2881',
 'logproxy.host' = 'xxx.xxx.xxx.xxx',
 'logproxy.port' = '2983'
 );

Flink SQL> CREATE TABLE `flinktest2` (
 id INT NOT NULL PRIMARY KEY,
 name varchar(32),
 description varchar(45),
 weight DECIMAL(10,3)
 ) WITH (
 'connector' ='jdbc',
 'url' = 'jdbc:mysql://xxx.xxx.xxx.xxx:2883/cdc_test2',
 'username' = 'cdc@flink_cdc_2',
 'password' = 'testcdc123',
 'table-name' = 'test2'
 );
查看表 flinktest1 现有数据。
Flink SQL> select * from flinktest1;
[INFO] Result retrieval cancelled.
查看表 flinktest2 现有数据。
Flink SQL> select * from flinktest2;
[INFO] Result retrieval cancelled.
执行 insert into select ,将表 flinktest1 收集的数据写入表 flinktest2。
Flink SQL> insert into flinktest2 select * from flinktest1;
[INFO] Submitting SQL update statement to the cluster...
[INFO] SQL update statement has been successfully submitted to the cluster:
Job ID: 7620ac78c627eab1f3dc4d86e7a29a17
查询下游 cdc@flink_cdc_2 租户表 test2 中的数据,可以看到上游 cdc@flink_cdc_1 租户表 test1 的数据已经被同步过来了。
MySQL [cdc_test2]> select * from test2;
+----+------+-------------+--------+
| id | name | description | weight |
+----+------+-------------+--------+
|  1 | aa   | haha        | 10.000 |
|  2 | bb   | haha        | 20.000 |
|  3 | cc   | haha        | 30.000 |
|  4 | dd   | haha        | 40.000 |
|  5 | ee   | haha        | 50.000 |
+----+------+-------------+--------+
5 rows in set (0.000 sec)
您也可以在 Web 页面中查看 Job 的执行情况。
在上游 OceanBase 集群 cdc@flink_cdc_1 租户表 test1 中插入一条数据。
MySQL [cdc_test1]> insert into test1(id,name,description,weight) values(6,'ff','haha',60);
Query OK, 1 row affected (0.006 sec)

MySQL [cdc_test1]> select * from test1;
+----+------+-------------+--------+
| id | name | description | weight |
+----+------+-------------+--------+
|  1 | aa   | haha        | 10.000 |
|  2 | bb   | haha        | 20.000 |
|  3 | cc   | haha        | 30.000 |
|  6 | ff   | haha        | 60.000 |
+----+------+-------------+--------+
4 rows in set (0.000 sec)
在下游 OceanBase 集群 cdc@flink_cdc_2 租户表 test2 中查看数据的变化。
MySQL [cdc_test2]> select * from test2;
+----+------+-------------+--------+
| id | name | description | weight |
+----+------+-------------+--------+
|  1 | aa   | haha        | 10.000 |
|  2 | bb   | haha        | 20.000 |
|  3 | cc   | haha        | 30.000 |
|  4 | dd   | haha        | 40.000 |
|  5 | ee   | haha        | 50.000 |
|  6 | ff   | haha        | 60.000 |
+----+------+-------------+--------+
6 rows in set (0.000 sec)
在上游 OceanBase 集群 cdc@flink_cdc_1 租户表 test1 中删除id=1的数据。
MySQL [cdc_test1]> delete from test1 where id=1;
Query OK, 1 row affected (0.005 sec)

MySQL [cdc_test1]> select * from test1;
+----+------+-------------+--------+
| id | name | description | weight |
+----+------+-------------+--------+
|  2 | bb   | haha        | 20.000 |
|  3 | cc   | haha        | 30.000 |
|  6 | ff   | haha        | 60.000 |
+----+------+-------------+--------+
3 rows in set (0.000 sec)
在下游 OceanBase 集群 cdc@flink_cdc_2 租户表 test2 中查看数据的变化,可以看到id=1的一条数据已被删除。
MySQL [cdc_test2]> select * from test2;
+----+------+-------------+--------+
| id | name | description | weight |
+----+------+-------------+--------+
|  2 | bb   | haha        | 20.000 |
|  3 | cc   | haha        | 30.000 |
|  4 | dd   | haha        | 40.000 |
|  5 | ee   | haha        | 50.000 |
|  6 | ff   | haha        | 60.000 |
+----+------+-------------+--------+
5 rows in set (0.000 sec)
在上游 OceanBase 集群 cdc@flink_cdc_1 租户表 test1 中修改id=2的name为yy。
MySQL [cdc_test1]> update test1 set name = 'yy' where id = 2;
Query OK, 1 row affected (0.004 sec)
Rows matched: 1  Changed: 1  Warnings: 0

MySQL [cdc_test1]> select * from test1;
+----+------+-------------+--------+
| id | name | description | weight |
+----+------+-------------+--------+
|  2 | yy   | haha        | 20.000 |
|  3 | cc   | haha        | 30.000 |
|  6 | ff   | haha        | 60.000 |
+----+------+-------------+--------+
3 rows in set (0.000 sec)
在下游 OceanBase 集群 cdc@flink_cdc_2 租户表 test2 中查看数据的变化,可以看到id=2的一条数据已被修改成功。
MySQL [cdc_test2]> select * from test2;
+----+------+-------------+--------+
| id | name | description | weight |
+----+------+-------------+--------+
|  2 | yy   | haha        | 20.000 |
|  3 | cc   | haha        | 30.000 |
|  4 | dd   | haha        | 40.000 |
|  5 | ee   | haha        | 50.000 |
|  6 | ff   | haha        | 60.000 |
+----+------+-------------+--------+
5 rows in set (0.000 sec)
查看 Job 的运行情况。
[admin@obtest004 bin]$ ./flink list
Waiting for response...
------------------ Running/Restarting Jobs -------------------
15.02.2023 14:52:07 : 31514c80a7cc1093ce442f71f5618671 : insert-into_default_catalog.default_database.flinktest2 (RUNNING)
--------------------------------------------------------------
No scheduled jobs.
通过 Job ID 取消 Job。
[admin@obtest004 bin] $./flink cancel 31514c80a7cc1093ce442f71f5618671
Cancelling job 31514c80a7cc1093ce442f71f5618671.
Cancelled job 31514c80a7cc1093ce442f71f5618671.
OceanBase(两个租户) > Flink > OceanBase #
测试目的 #
测试将上游 OceanBase 集群租户 flink_cdc_1 和租户 flink_cdc_2 中的不同数据通过 Flink 进行 join 同步之后,将数据写入下游 OceanBase 集群租户 flink_cdc_3 中。
测试步骤 #
在上游的两个租户中分别创建表 flinkcdc1、flinkcdc2 并写入数据
在下游的租户中创建表 flinkcdc3。然后在 Flink Client 中创建表 cdctest1、cdctest2、cdctest3
将表 cdctest1 和 表 cdctest2 进行 join,并将join后的数据写入到表 cdctest3 中
分别在上游 OceanBase 侧表 flinkcdc1、flinkcdc2 中进行 insert、delete、update,查看下游 OceanBase 侧表 flinkcdc3 中数据的变化。
| Tenant | DataBase | Table |
|---|---|---|
| flink_cdc_1 | cdc_test1 | flinkcdc1 |
| flink_cdc_2 | cdc_test2 | flinkcdc2 |
| flink_cdc_3 | cdc_test3 | flinkcdc3 |
操作步骤 #
在上游的两个租户 flink_cdc_1 和 flink_cdc_2 中分别创建表 flinkcdc1 和 flinkcdc2 并写入数据,在下游的租户 flink_cdc_1 中创建表 flinkcdc3。
CREATE TABLE `flinkcdc1` (
   `id` int NOT NULL,
   `remarks` varchar(45) DEFAULT NULL,
   `kg` decimal(10,3) DEFAULT NULL,
   PRIMARY KEY (`id`)
) CHARSET=utf8mb4;

insert into flinkcdc1(id,remarks,kg) values(1,'aa',10);


CREATE TABLE `flinkcdc2` (
   `id` int NOT NULL,
   `name` varchar(45) DEFAULT NULL,
   `description` varchar(45) DEFAULT NULL,
   `weight` decimal(10,3) DEFAULT NULL,
   PRIMARY KEY (`id`)
 ) CHARSET=utf8mb4;

insert into flinkcdc2(id,name,description,weight) values(1,'yr','test1',10);


CREATE TABLE `flinkcdc3` (
   `id` int NOT NULL,
   `name` varchar(45) DEFAULT NULL,
   `description` varchar(45) DEFAULT NULL,
   `weight` decimal(10,3) DEFAULT NULL,
   `remarks` varchar(45) DEFAULT NULL,
   `kg` decimal(10,3) DEFAULT NULL,
   PRIMARY KEY (`id`)
 ) CHARSET=utf8mb4;
在 Flink Client 中创建表 cdctest1、cdctest2、cdctest3,将表 cdctest1 和 表 cdctest2 进行join,并将join后的数据写入到表 cdctest3 中。
CREATE TABLE `cdctest1` (
id int NOT NULL,
remarks varchar(45),
kg decimal(10,3)
) WITH (
'connector' ='oceanbase-cdc',
'scan.startup.mode' = 'initial',
'username' = 'cdc@flink_cdc_1',
'password' = 'testcdc123',
'tenant-name' = 'flink_cdc_1',
'database-name' = 'cdc_test1',
'table-name' = 'flinkcdc1',
'hostname' = 'xxx.xxx.xxx.xxx',
'port' = '2883',
'rootserver-list' ='xxx.xxx.xxx.xxx:2882:2881;xxx.xxx.xxx.xxx:2882:2881;xxx.xxx.xxx.xxx:2882:2881',
'logproxy.host' = 'xxx.xxx.xxx.xxx',
'logproxy.port' = '2983'
);


CREATE TABLE `cdctest2` (
id int NOT NULL,
name varchar(45),
description varchar(45),
weight decimal(10,3)
) WITH (
'connector' ='oceanbase-cdc',
'scan.startup.mode' = 'initial',
'username' = 'cdc@flink_cdc_2',
'password' = 'testcdc123',
'tenant-name' = 'flink_cdc_2',
'database-name' = 'cdc_test2',
'table-name' = 'flinkcdc2',
'hostname' = 'xxx.xxx.xxx.xxx',
'port' = '2883',
'rootserver-list' ='xxx.xxx.xxx.xxx:2882:2881;xxx.xxx.xxx.xxx:2882:2881;xxx.xxx.xxx.xxx:2882:2881',
'logproxy.host' = 'xxx.xxx.xxx.xxx',
'logproxy.port' = '2983'
);


CREATE TABLE `cdctest3` (
id int NOT NULL PRIMARY KEY,
name varchar(45),
description varchar(45),
weight decimal(10,3),
remarks varchar(45),
kg decimal(10,3)
) WITH (
  'connector' ='jdbc',
  'url' = 'jdbc:mysql://xxx.xxx.xxx.xxx:2883/cdc_test3',
  'username' = 'cdc@flink_cdc_3',
  'password' = 'testcdc123',
  'table-name' = 'flinkcdc3'
  );

insert into cdctest3 select cdctest2.id,cdctest2.name,cdctest2.description,cdctest2.weight,cdctest1.remarks,cdctest1.kg    from cdctest1,cdctest2 where cdctest1.id=cdctest2.id;
在下游租户的表 flinkcdc3 中查看数据同步,可以看到表 flinkcdc1 和表 flinkcdc2 进行 join 后的数据已经被同步过来了。
MySQL [cdc_test3]> select * from flinkcdc3;
+----+------+-------------+--------+---------+--------+
| id | name | description | weight | remarks | kg     |
+----+------+-------------+--------+---------+--------+
|  1 | yr   | test1       | 10.000 | aa      | 10.000 |
+----+------+-------------+--------+---------+--------+
1 row in set (0.000 sec)
您也可以在 Web 页面中查看 Job 的执行情况。
分别在上游租户的表 flinkcdc1 和表 flinkcdc2 中插入一条数据。
MySQL [cdc_test1]> insert into flinkcdc1(id,remarks,kg) values(2,'bb',20);
MySQL [cdc_test2]> insert into flinkcdc2(id,name,description,weight) values(2,'yr','test2',20);
在下游表 flinkcdc3 中查看数据变化,可以看到表 flinkcdc1 和表 flinkcdc2 刚插入的数据已经被同步过来了。
MySQL [cdc_test3]> select * from flinkcdc3;
+----+------+-------------+--------+---------+--------+
| id | name | description | weight | remarks | kg     |
+----+------+-------------+--------+---------+--------+
|  1 | yr   | test1       | 10.000 | aa      | 10.000 |
|  2 | yr   | test2       | 20.000 | bb      | 20.000 |
+----+------+-------------+--------+---------+--------+
2 rows in set (0.000 sec)
修改上游表 flinkcdc1 中的数据。
MySQL [cdc_test1]> update flinkcdc1 set remarks='cc' where id = 2;
Query OK, 1 row affected (0.008 sec)
Rows matched: 1  Changed: 1  Warnings: 0

MySQL [cdc_test1]> select * from flinkcdc1;
+----+---------+--------+
| id | remarks | kg     |
+----+---------+--------+
|  1 | aa      | 10.000 |
|  2 | cc      | 20.000 |
+----+---------+--------+
2 rows in set (0.001 sec)
在下游表 flinkcdc3 中查看数据变化,可以看到表中的数据已被修改。
MySQL [cdc_test3]> select * from flinkcdc3;
+----+------+-------------+--------+---------+--------+
| id | name | description | weight | remarks | kg     |
+----+------+-------------+--------+---------+--------+
|  1 | yr   | test1       | 10.000 | aa      | 10.000 |
|  2 | yr   | test2       | 20.000 | cc      | 20.000 |
+----+------+-------------+--------+---------+--------+
2 rows in set (0.000 sec)
删除上游表 flinkcdc2 中id=1的数据。
MySQL [cdc_test2]> delete from flinkcdc2 where id = 1;在下游表 flinkcdc3 中查看数据变化,可以看到 id=1 的一条数据已被删除。
MySQL [cdc_test3]> select * from flinkcdc3;
+----+------+-------------+--------+---------+--------+
| id | name | description | weight | remarks | kg     |
+----+------+-------------+--------+---------+--------+
|  2 | yr   | test2       | 20.000 | cc      | 20.000 |
+----+------+-------------+--------+---------+--------+
常见问题 #
Flink 的 Web 页面无法访问时,需要修改 /etc/hosts 文件。Flink 进程的监听 IP 端口是 127.0.0.1:8081,只能本机进行访问,外部服务器无法访问,因此需要将 /etc/hosts 文件中的 127.0.0.1 改为实际的 IP。
## vim /etc/hosts
172.xxx.xxx.xxx  localhost       localhost.localdomain   localhost4      localhost4.localdomain4
当 oblogproxy 日志出现如下错误时,可以直接忽略。该错误为 WARNING 类型,不影响同步结果,后续版本中会进行修复。
E20230215 15:43:58.279422 28808 mysql_protocol.cpp:239] Failed to query observer:Table 'oceanbase. __all_virtual_server_clog_stat' doesn't exist, unexpected column count: 0